Map Mods: Phase 2
Updated with v252 - April 2020 By Marcos Elias
Introduction
Phase 2 of the Proton Bus map mod system allows for passengers, traffic, and more things in the game! This takes it to another level, literally separating Proton before and after this feature. It's almost like a new game!
Warning: Due to time constraints, individual support is not possible for the conversion and editing process. We recommend trying it yourself, seeing how other maps were made, and exploring the file structures. Prefer posting questions and related problems in the Facebook game groups, so solutions can help everyone, and other mod producers can help you too.
If you haven't subscribed yet, join the producer's channel: www.youtube.com/marquinhosxp. Some videos and tutorials are posted there.
Official PBSU Facebook Page: https://www.facebook.com/protonbusoficial And PBSR: https://www.facebook.com/protonbusrod.oficial/
Facebook Groups
Exclusive group for mod creators: https://www.facebook.com/groups/pbsmods/ Please avoid joining this if you are just a player, to not clutter with off-topic posts (which will be deleted)!
Groups for users: In these, free posts of screenshots, tips, videos, various tutorials, etc., from the players' point of view:
- International group: https://www.facebook.com/groups/1264008273712815/
- Official Brazilian group, from the team: https://www.facebook.com/groups/2238192089740569/
- Older fan groups:
Tip for a good site to get textures for mods: http://www.textures.com
Notes regarding Phase 1
Before starting a map in Phase 2, you must have mastered basic level production for Phase 1. If you are not familiar yet, don't worry, you can follow this guide along with the sample map. The biggest requirement is having basic Blender knowledge, as we will use it to export the maps.
The old documentation regarding Phase 1 is here, for maps: http://blog.protonbus.com.br/2019/09/experimental-mods-de-mapas-no-pbs.html
And for buses: http://blog.protonbus.com.br/2018/09/primeira-fase-do-sistema-de-mods-de.html
It is always good to be on the latest version of the game! Old ones are no longer supported, the beta is constantly evolving, so we always consider the latest. You can find the latest builds at http://pbsu.busmods.com for urban and http://pbsr.busmods.com for road.
Basically, we use Blender 2.79 to produce the scenery, export the model in 3ds format, and create the folder and file structure for the Proton Bus system.
IMPORTANT: USE BLENDER 2.79! The exporter required for the current game format does not work with Blender 2.8, apparently, it was discontinued and no one has updated it to date. Maybe it will work again in the future, some people are trying.
You can download Blender 2.79 here: https://download.blender.org/release/Blender2.79/ The latest version is usually the one with a “b” in the name. The platform is indifferent, it will depend on your system (Windows, Linux, or Mac) and architecture (32 or 64 bit).
If you already started the map in 2.8, the recommendation would be to export to some intermediate format that 2.79 can open and then export from it to the game.
IMPORTANT: MODIFY THE 3DS EXPORTER FOR PROTON! The default 3ds exporter in Blender truncates object and texture names at 12 characters. We will normally need more than that to avoid errors in the names of some parts and/or textures.
Download the modified Blender plugin for exporting (file for Blender 2.79): http://proton.viamep.com/coisas/export_3ds_protonbus_blender279.zip
TUTORIAL ON HOW TO CHANGE THE PLUGIN: https://youtu.be/0EokFmSjGdA
If you prefer, instead of downloading this one, change the export_3ds.py file in the scripts\addons\io_scene_3ds folder of your Blender. Look for [:12] and change the 12 to a much larger number, like 999. It is the character limit. Without this, exporting to the game may fail.
TIP: WHEN DOWNLOADING BLENDER YOU CAN OPT FOR THE “PORTABLE” ZIP VERSIONS, TO KEEP MULTIPLE VERSIONS AT THE SAME TIME.
The map mod file structure
The map in Proton is composed of several txt files (plain text), and some folders. The essential primary structure is a map definition txt and a folder, both residing inside the maps folder, which in turn resides in the game's mods folder.
Example of structure on PC:
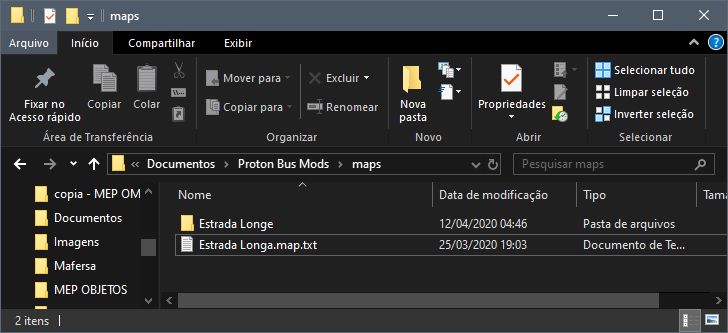
The map definition txt must end in .map.txt (e.g., Estrada Longa.map.txt). It must be a unique name!
IMPORTANT: NEVER USE ACCENTS, CEDILLAS, OR SPECIAL CHARACTERS IN MOD FILE NAMES!
Inside this txt we will have the basic structure:
[map]
baseDir=Estrada Longe
; The base folder of the map, which is in maps along with the .map.txt
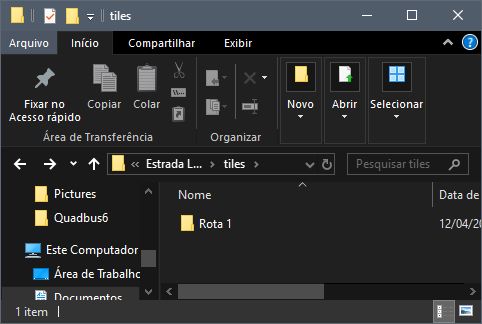
modelsDir=Rota 1
; The models folder, which is inside the tiles folder
textures=textures
; The textures folder
mapModVersion=2
; Use number 2 in Phase 2!
preview=preview.png
; Selection screen image (16:9, e.g., 640x360)Inside the map's base folder, there must be other folders:
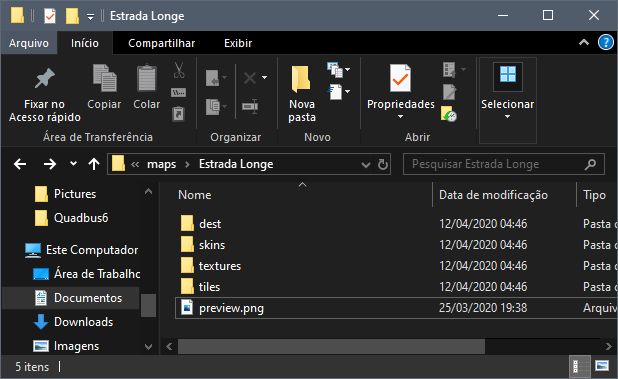
dest: Stores signs and plates.skins: Stores map bus skins (insideskins/0/pbc).textures: Stores textures. Avoid JPG, use PNG!tiles: Must have this name compulsorily. Inside it is the models folder (modelsDir).
IMPORTANT: PROTON BUS MAP MODS ARE LOADED ENTIRELY! THEY CANNOT BE TOO HEAVY. IF YOU ARE GOING TO MAKE SEVERAL LONG LINES, DIVIDE THEM INTO PARTS.
Inside the folder defined in modelsDir, are the exported .3ds files and configurations:
Internal structure of the models folder:
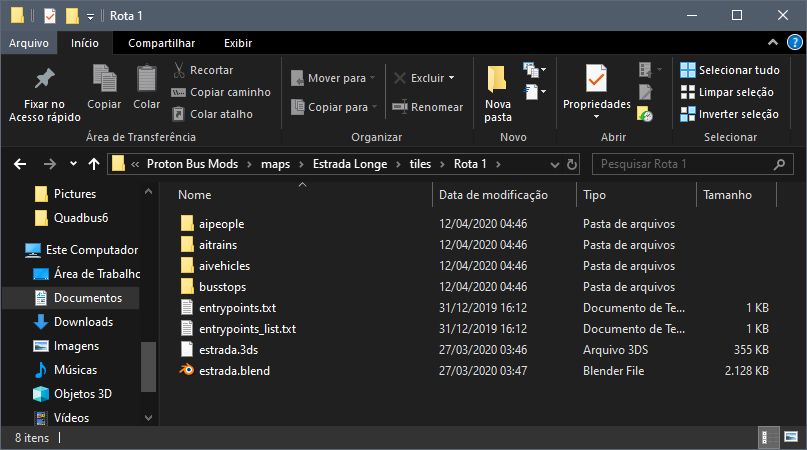
aipeople: Pedestrian settings.aitrains: Train settings.aivehicles: Traffic settings.busstops: Bus stop settings.entrypoints.txt: Advanced entry point settings.entrypoints_list.txt: Simple list of entry points.
IMPORTANT: MODS ARE NOT PROTECTED! TECHNICALLY NO GAME IS. THE ONLY WAY NOT TO HAVE YOUR MOD EDITED OR LEAKED IS BY NOT RELEASING IT.
Configuring entry points
Entry points define where the bus appears when starting the game. They must have unique names (e.g., 351F-10 TP, Garagem Central).
IMPORTANT: NEVER USE ACCENTS OR SPECIAL CHARACTERS IN THESE NAMES! DO NOT USE SLASHES EITHER.
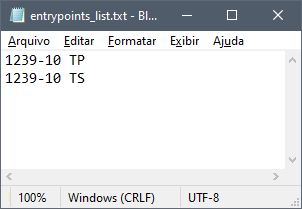
entrypoints_list.txt
Simple list, one name per line.
entrypoints.txt
Defines position and physical rotation on the map.
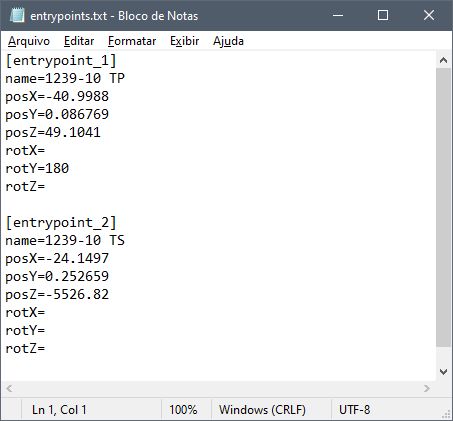
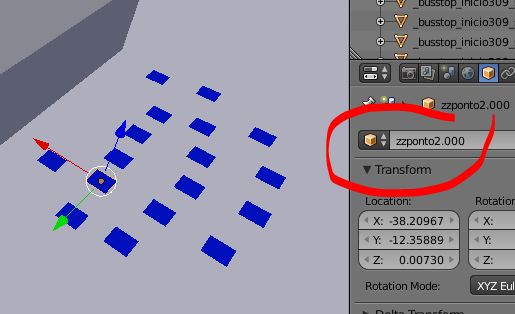
Remember: In Blender Y is front/back and Z is height. In Unity (game), Y is height and Z is front/back. Invert Y and Z when copying coordinates!
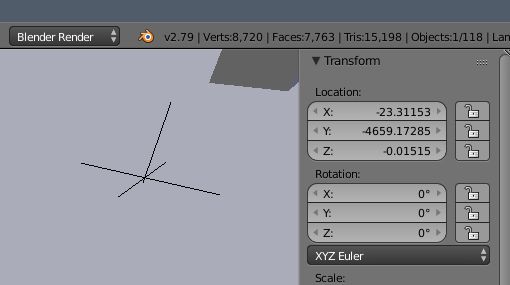
To find out the coordinates, use an Empty object in Blender:
Signs and Destinations
In the dest folder, create folders with EXACTLY the same name as the entrypoints defined in the txt.

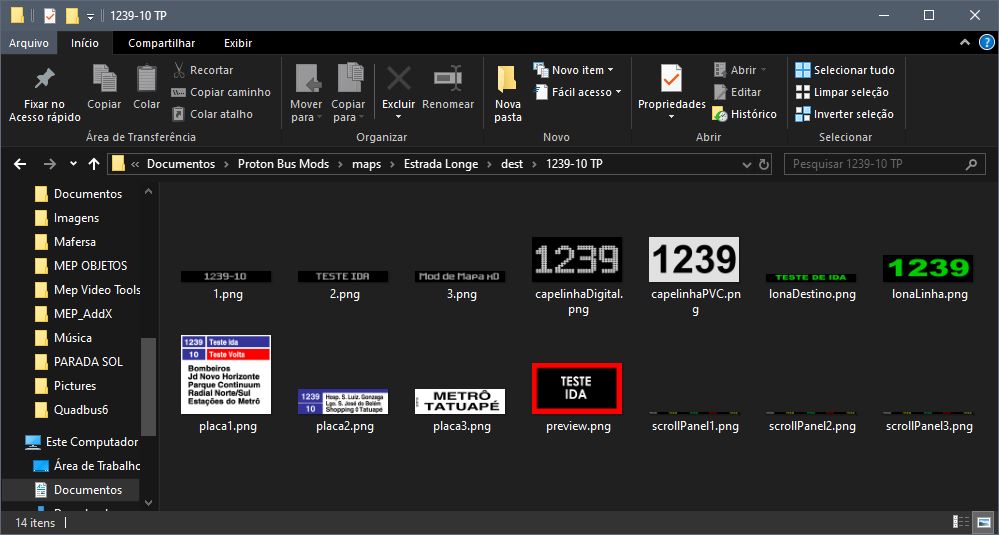
Inside each destination folder are the images:
IMPORTANT: AVOID IMAGES LARGER THAN 2048 PIXELS FOR MOBILE PHONES!
Suggested filenames for signs:
1.png,2.png,3.png(Electronic signs 1024x128)capelinhaDigital.png,capelinhaPVC.png(256x128)lonaDestino.png,lonaLinha.png(Rollband signs)placa1.png,placa2.png,placa3.png(Side and front plates)
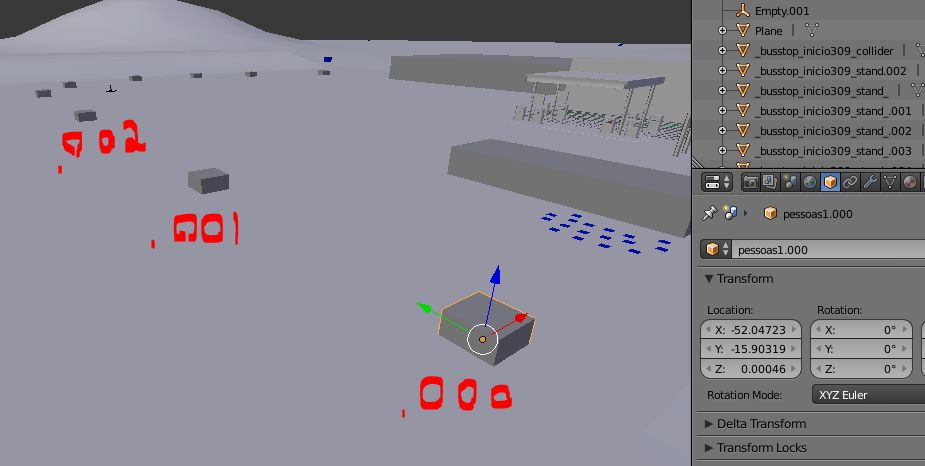
Configuring passengers
Each stop must have a unique name in 3D (e.g., zzPonto1).
In Blender (3D)
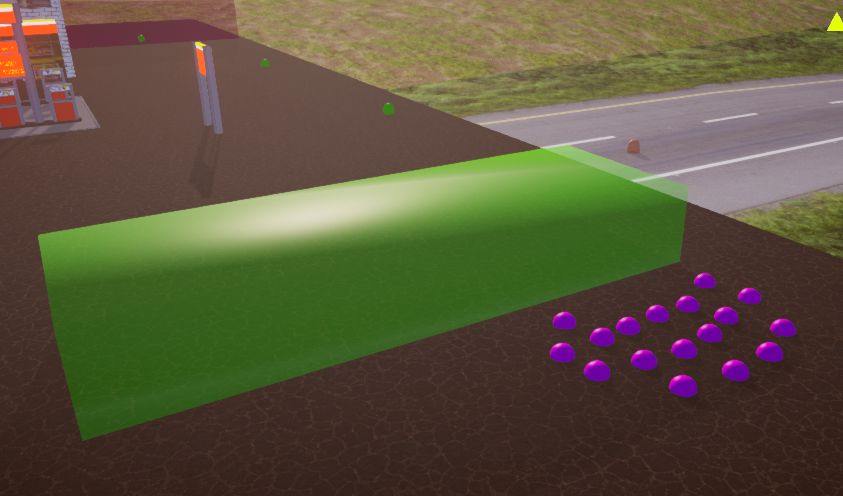
The stop consists of:
- An invisible cube (trigger) called
nomedoponto_trigger. - Small objects (planes/cubes) for passenger position, called
nomedoponto.000,nomedoponto.001, etc.
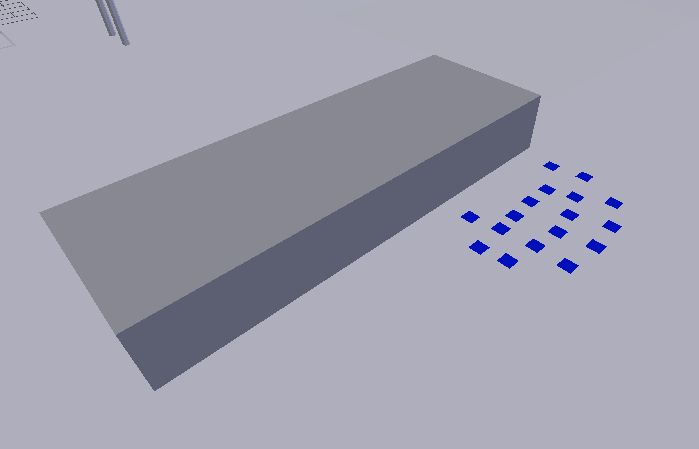
TIP: Use simple planes for passengers to save polygons.
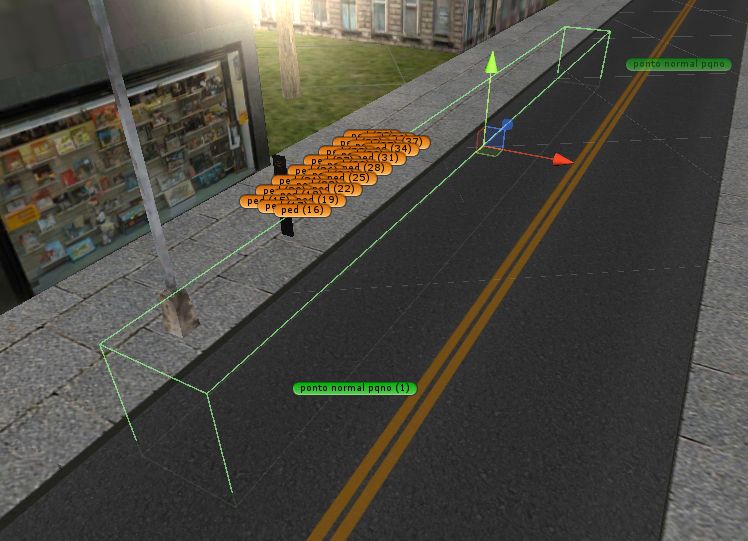
Correct Trigger:
Example of well-positioned trigger:
Example of poorly positioned trigger (cannot do!):
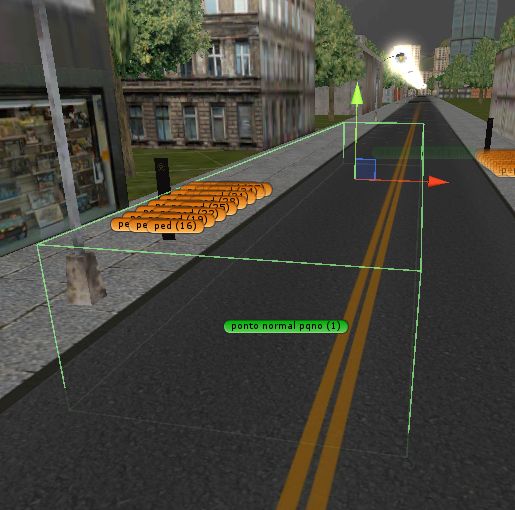
Overlapping (cannot do!):
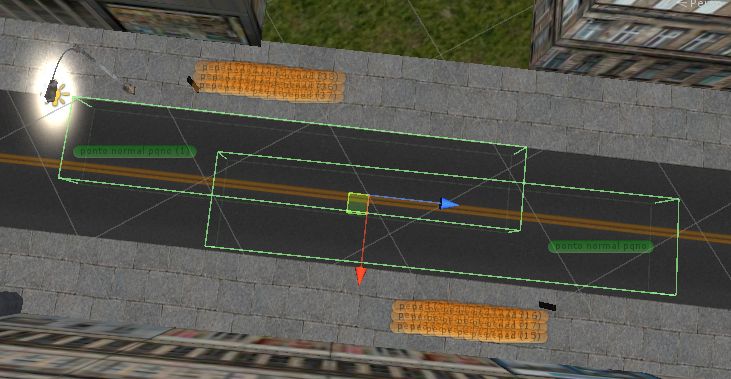
Correct at opposite stops:
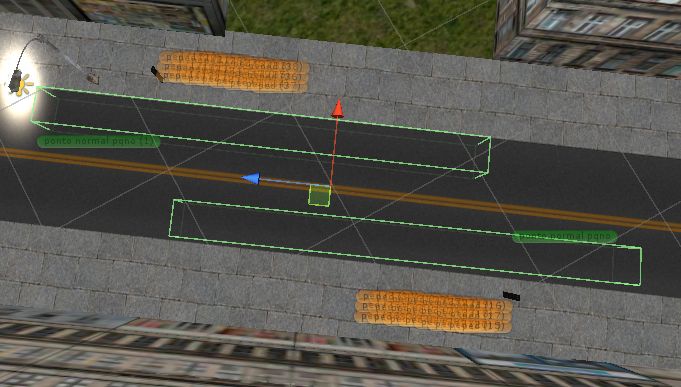
Visualization in Debug:
In the .txt file (busstops)
Create a txt in the busstops folder with the same name as the stop.
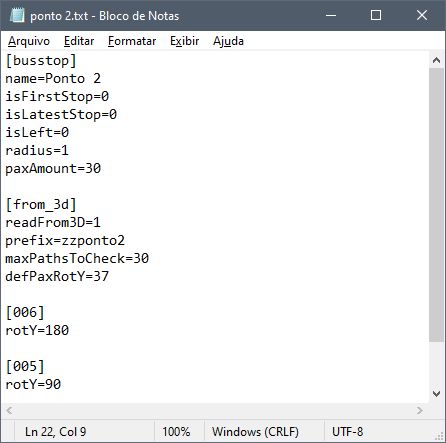
[busstop]
name=Praça Stop
isLeft=0
paxAmount=15

[from_3d]
readFrom3D=1
prefix=zzPonto1
maxPathsToCheck=30
defPaxRotY=90prefix: Must match exactly the name used in 3D (before the .000).defPaxRotY: Default passenger rotation (test 0, 90, 180, -90).
Configuring pedestrians
Works similar to stops: a sequence of objects defining a path.
Example: xxCalcada1.000, xxCalcada1.001, etc.

Create a txt in the aipeople folder:
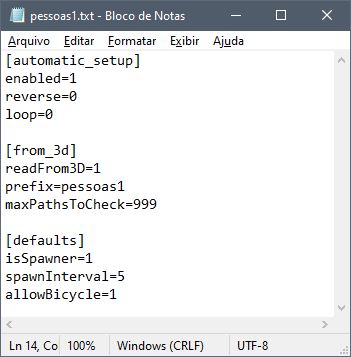
[automatic_setup]
enabled=1
loop=0
reverse=0

[defaults]
isSpawner=1
spawnInterval=5
allowBicycle=0loop=1: The last point connects to the first (circular).loop=0: The path ends at the last point (linear).
Configuring traffic vehicles
Just like pedestrians! aivehicles folder.
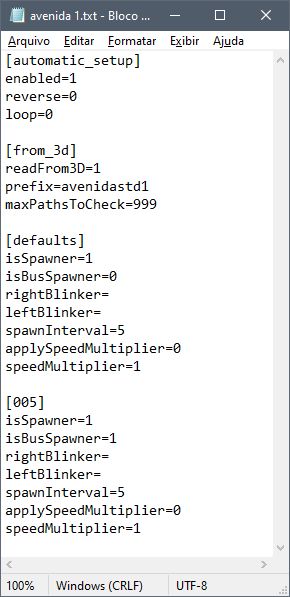
isBusSpawner=1: To make buses appear.spawnInterval: Increase to reduce traffic.speedMultiplier: Change speed (e.g., 0.5 half, 2 double).
Configuring map bus skins
Place skins (PNG) in skins/0/pbc. The game chooses randomly.
PBC skin base: http://omsi.viamep.com/proton/base-skins-pbc-protonbussimulator.zip
Configuring trains
Same logic, aitrains folder.
Recommendation: isSpawner=0 in defaults, and define manual spawners spaced out.
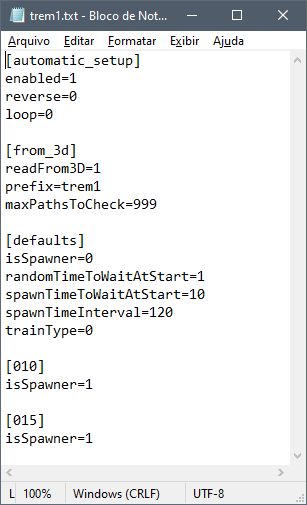
randomTimeToWaitAtStart=1: Starts at random time.spawnTimeInterval: Interval between trains (e.g., 120 seconds).
IMPORTANT: TRAINS DO NOT STOP! THEY RUN OVER EVERYTHING. DO NOT MAKE LEVEL CROSSINGS.
Special commands and names in 3D models
- Transparency: Use
_transparent_in the object name (e.g.,grade_transparent_). - Colliders: Use
_gencol_to generate automatic collider (streets, sidewalks). Use sparingly! - Invisible Collider: Use
_gencol_invisible_(e.g.,barreira_gencol_invisible_). - Emissive: Use
_emissive_for always-on objects. - Low Speed Zone: Object
_low_speed_zone_for terminals (avoids complaints).
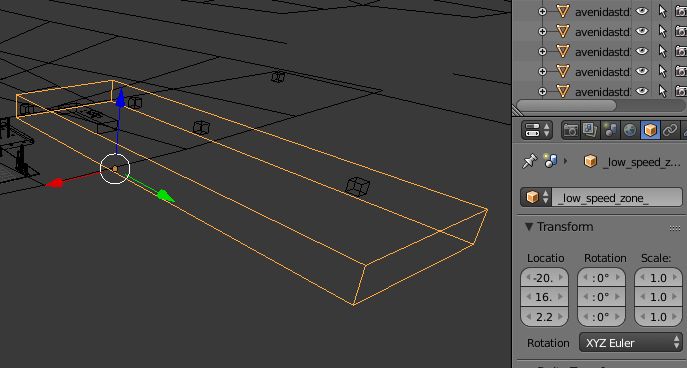
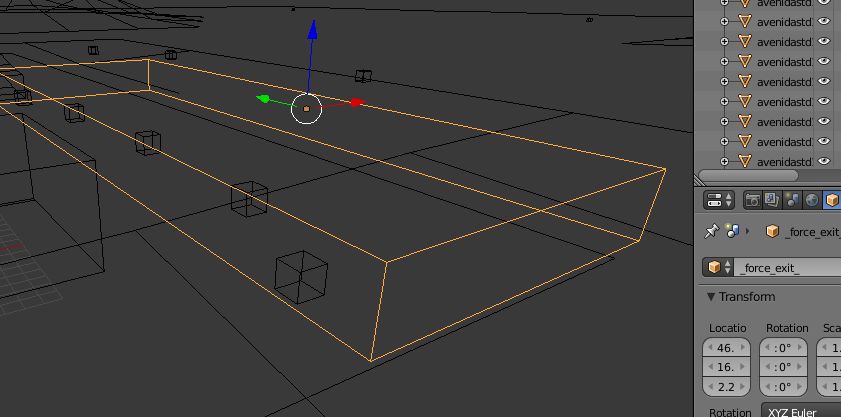
- Force Exit: Object
_force_exit_near the final stop.
- Extra Details: End the 3DS file with
_det1.3ds(e.g.,arvores_det1.3ds). Only loads if the user enables "Extra Details".
Glittering texture configuration
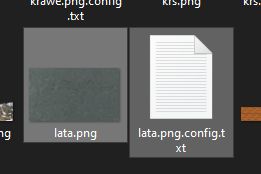
To avoid textures flickering (z-fighting/flickering) on the ground, create a .config.txt file next to the texture.
Ex: asphalt.png.config.txt.
Extras - Optimization tips
- Small Textures: Use 256x256 or 512x512 for repetitive textures.
- MAX 2048px: NEVER use textures larger than 2048px for mobile!
- Colliders: Avoid complex colliders. Use
_gencol_only on the ground and main walls. - Materials: Avoid many materials on the same object.
- Combine Objects: Combine nearby trees with the same material to reduce draw calls.
That's all for now! Have fun!